How I Imported all the missing imports with 1 hidden option?

I was working on one of my new angular projects, I have to create a copy of the existing component and I have to do this multiple times. During this process, I have a new trick in VS Code which I would like to & going to share with my fellow developers in this article.
If you are not working on VS Code then this article is not for you. However, you are free to read further.
While creating a copy I have to keep a few imports & replace a few. For the copy, I was in a hurry & I manually did it.
For the second one, I wanted to find a new way because I know I might face the same “Deja Vu” in the coming projects. So I started looking for options & found it hidden(not literally) the context menu.
In case, in the future or now, if you have a similar issue or trouble then this is for you. It will save a lot of time and labor.
Problem
I have a component in one of my existing project and now I need to use this in the new project. Both are Angular projects.
- Core & Vendor dependencies are the same
- Internal dependencies are different (this is where I need help)
Assumptions
- Using VS Code
- Angular Project
Solution: Step 1
First, copy your class leaving @component decorator metadata and paste it in your new component. And update the dependency injects & types using Find & Replace then Right-Click to open the context menu. In there, you will see an option called Source Action like in the below screenshot, click on Source Action.

Right-Click -> Source Action
Solution: Step 2
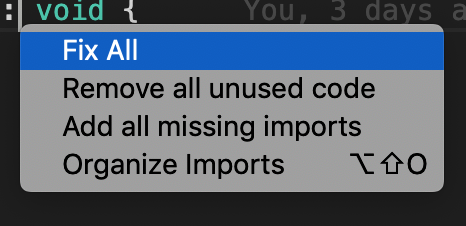
Once it’s done, you will see a new menu with different options, one among them is Add all missing imports. You might need to click on that as a final step.

Source Action -> Add all missing imports
And that’s it! You will see all the missing imports imported into your new component.
Conclusion
Thanks for reading this article till the end. Did this help? or You have any easy way to do this? I would be really happy to know your thoughts. Please comment on them below.
