After a long gap, I’m happy to write a blog on an alarm clock application using Angular.
This article (Part 2) comes with the creation of a User interface for alarm clock and with basic handling with different scenarios.
So, let’s jump into it without any more delay.
Requirements
Before coding, let’s first understand our agenda for today. To create an alarm clock we need at least 3 views which are listed below:
Required Views:
One-time Alarm clock form
Repeating Alarm clock form
Alarms Listing
As part of those views, we need below elements or components:
Required UI Elements:
Date picker for one-time alarm
If repeating alarm, list of days to choose from
Time picker
Save button
A listing page for alarms
Points to Remember:
Using Bootstrap for CSS
Using Fontawesome for Icons (optional)
Using HTML date input & time input for date picker & time picker respectively throughout this series.
As of now, we will be adding all the views in the default component app.component.[html|ts|scss]
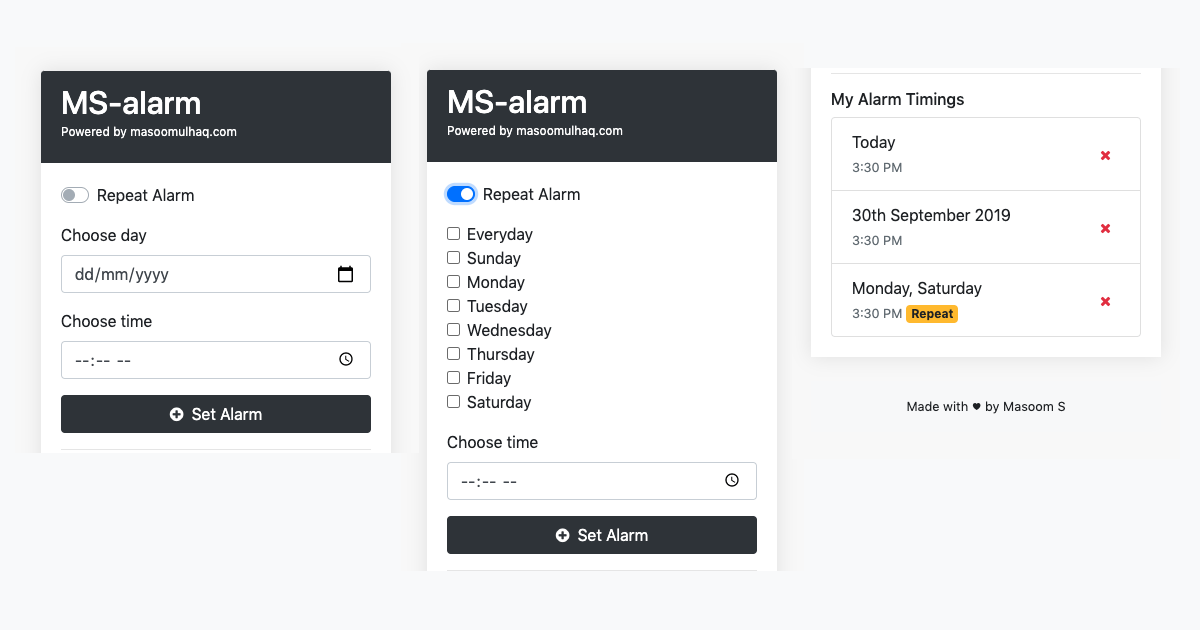
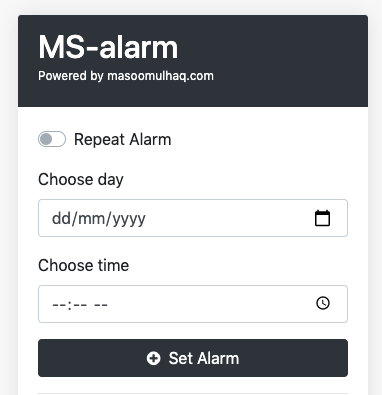
One-time Alarm clock form
Whatever may be the type of alarm you are setting, we need a form for that. To understand the requirement of a one-time alarm clock form, we must understand what is a one-time alarm.
The one-time alarm is an alarm that triggers only once after setting up. For example, You have set up an alarm for 6:00 AM tomorrow with a one-time alarm form, then it will get triggered at the specified time tomorrow and will not get trigger after tomorrow.
That’s it! Our one-time alarm clock form is ready. Let’s move to the next form.
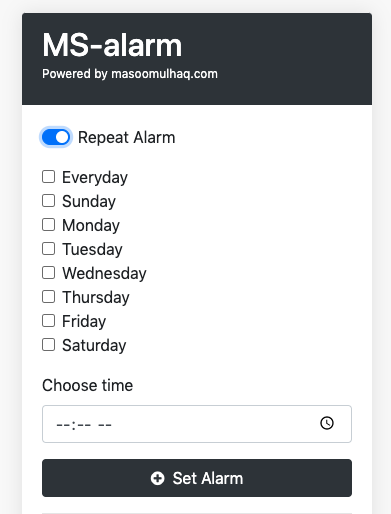
Repeating Alarm clock form
Repeating alarm clock form is required to set up alarms which will trigger more than once after saving only once. Let’s understand it with an example, assume you have created an alarm for 6:00 AM for some days() using repeating alarm clock then this will keep on triggers alarm for the specified time on the specified days continuously unless you remove the created alarm.
Key things to remember in this alarm is that we must specify the time as well as the choose days (Ex: Monday, Friday, etc.,).
View:
Repeating Alarm
For this form, we need:
List of days to choose from
Time picker
Save button
Script:
Here days array contains a list of all the days in a week as well all Everyday option.
While combining both the forms, I have added a switch to toggle between a one-time alarm form and a repeating alarm form. By default, this form shows a one-time alarm, by toggling the switch you can toggle between forms.
Here is how the code looks after combining the forms:
Script:
In case, if you want to show repeating alarm by default, then set isRepeatAlarm to true in the code given below:
Masoom is a Front-end Developer, a UX Engineer and Freelancer based in Bangalore, India. Like to develop differential and effective User Experiences for digital products using an amalgamation of latest technology and best practises.